Tag Archives: construction

DesignStorm

Everyone knows about brainstorming, but have you ever heard of DesignStorming? This is a technique we use often at John MacDonald Architect (JMA). It helps to explore the infinite possibilities of a particular project by compiling solutions from different designers with different approaches and styles.

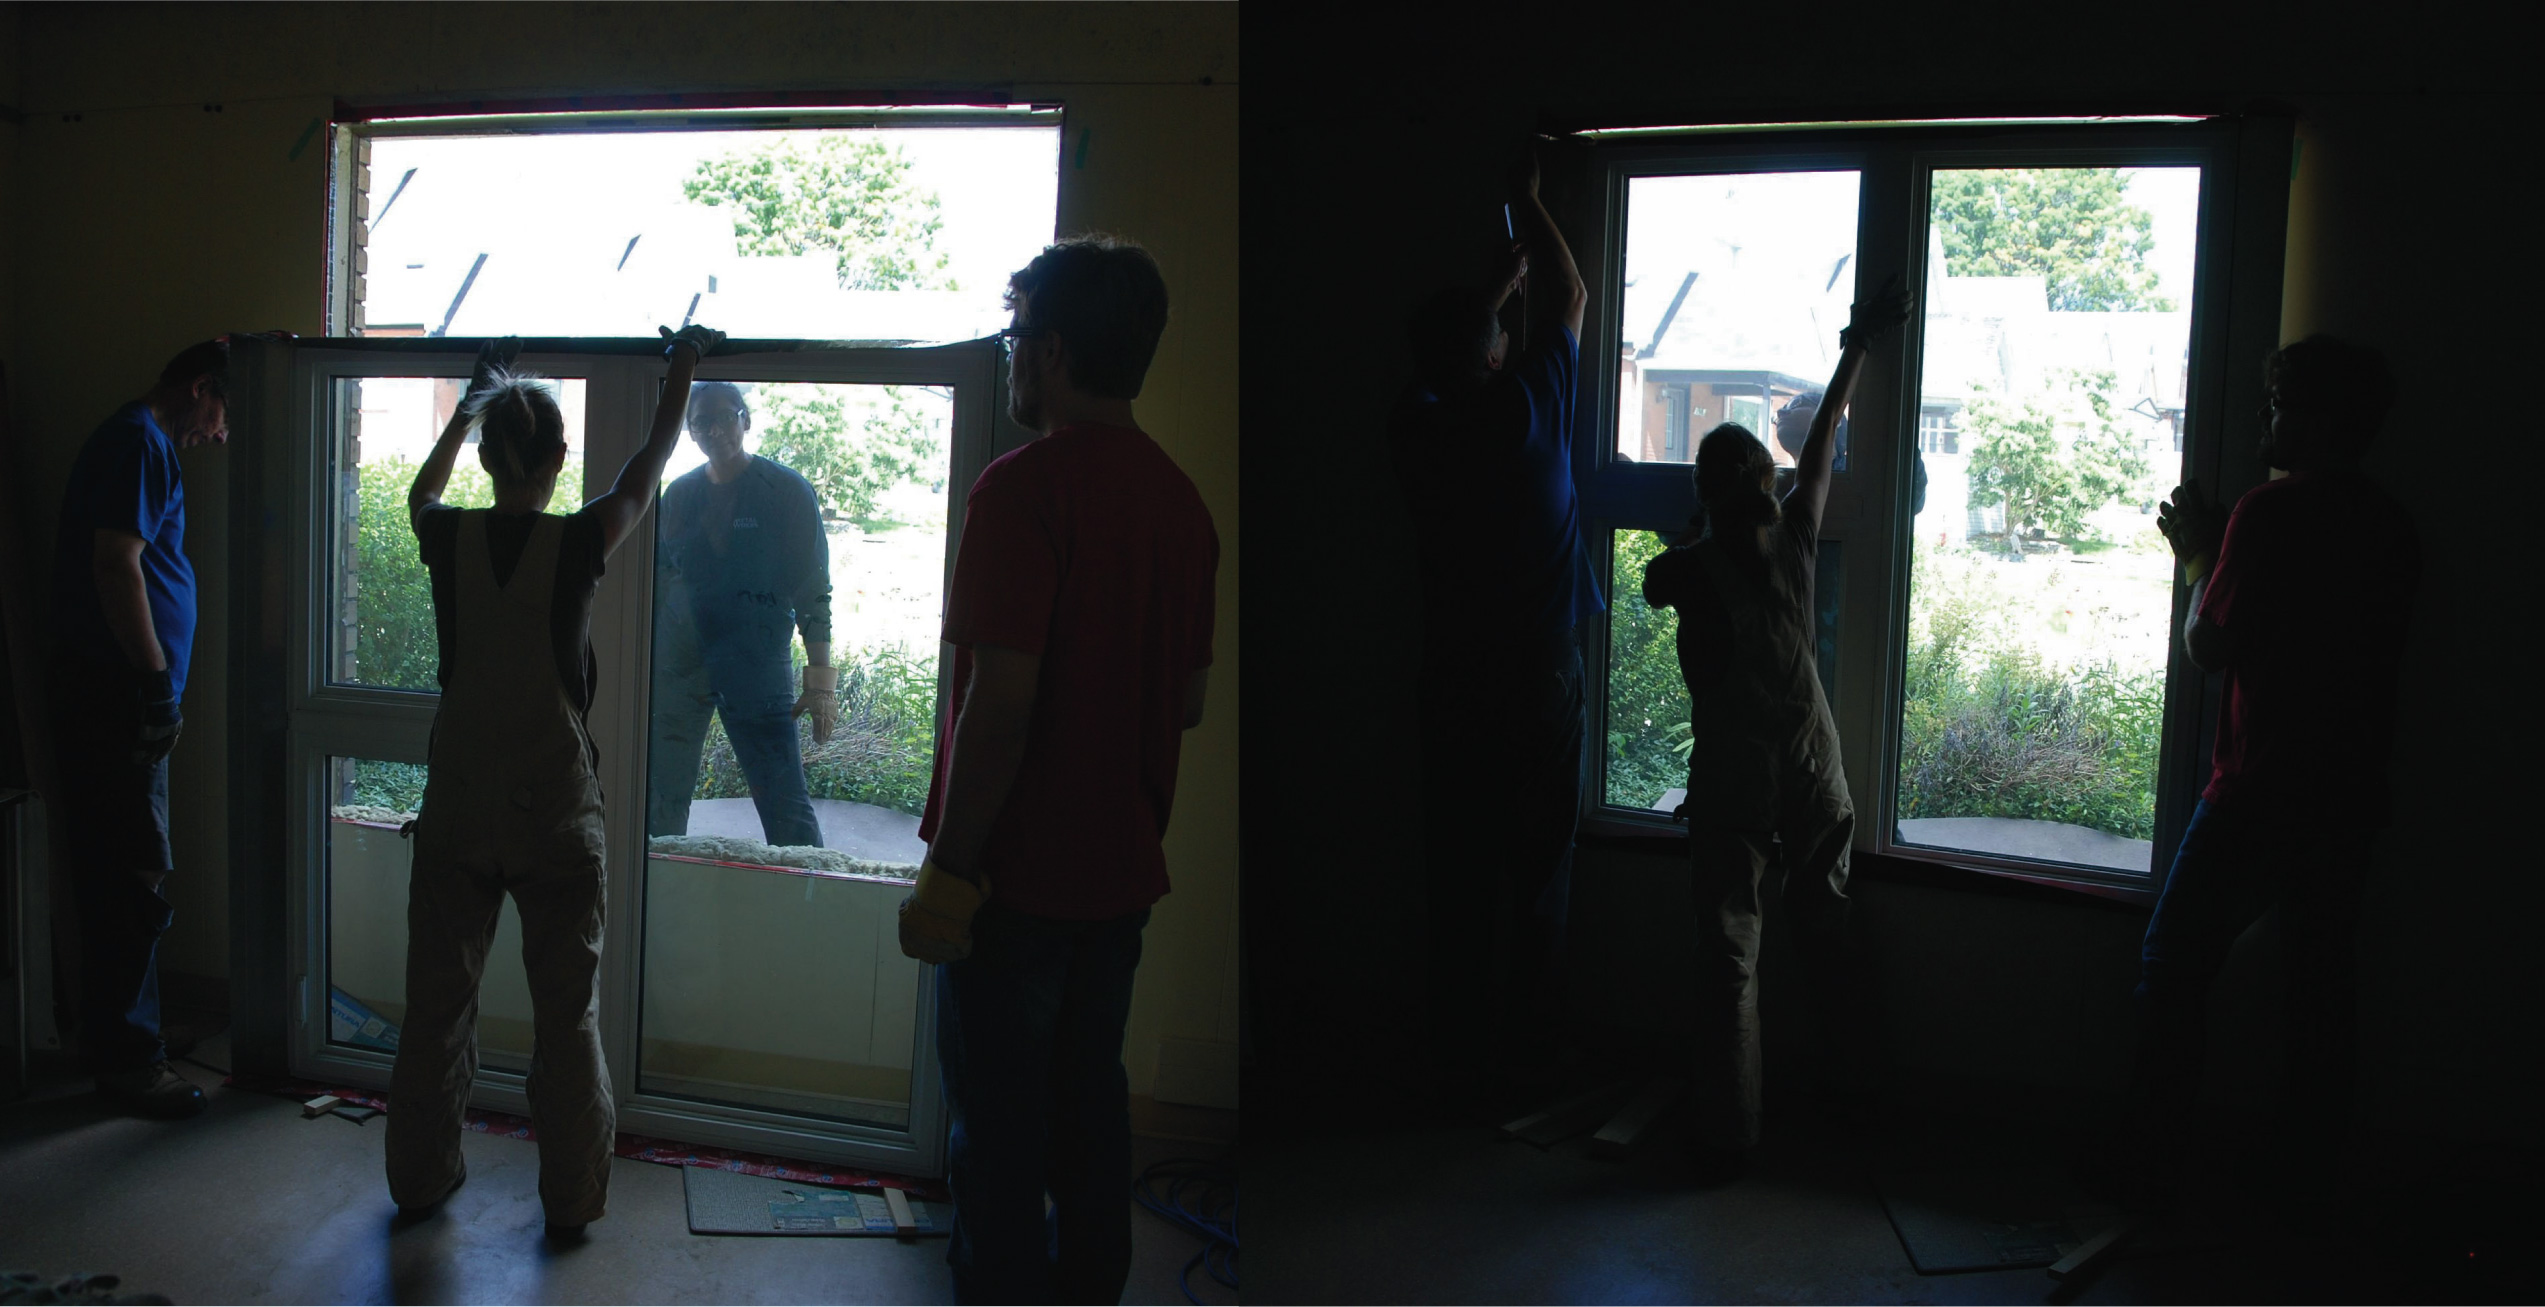
Our most recent DesignStorm was undertaken for a lighting project here in our office. Each designer was presented with the existing situation, which was 3 fluorescent light fixtures that run the length of our office. Designers where then given the task; these large, long lights required some form of stylish covering.

panorama

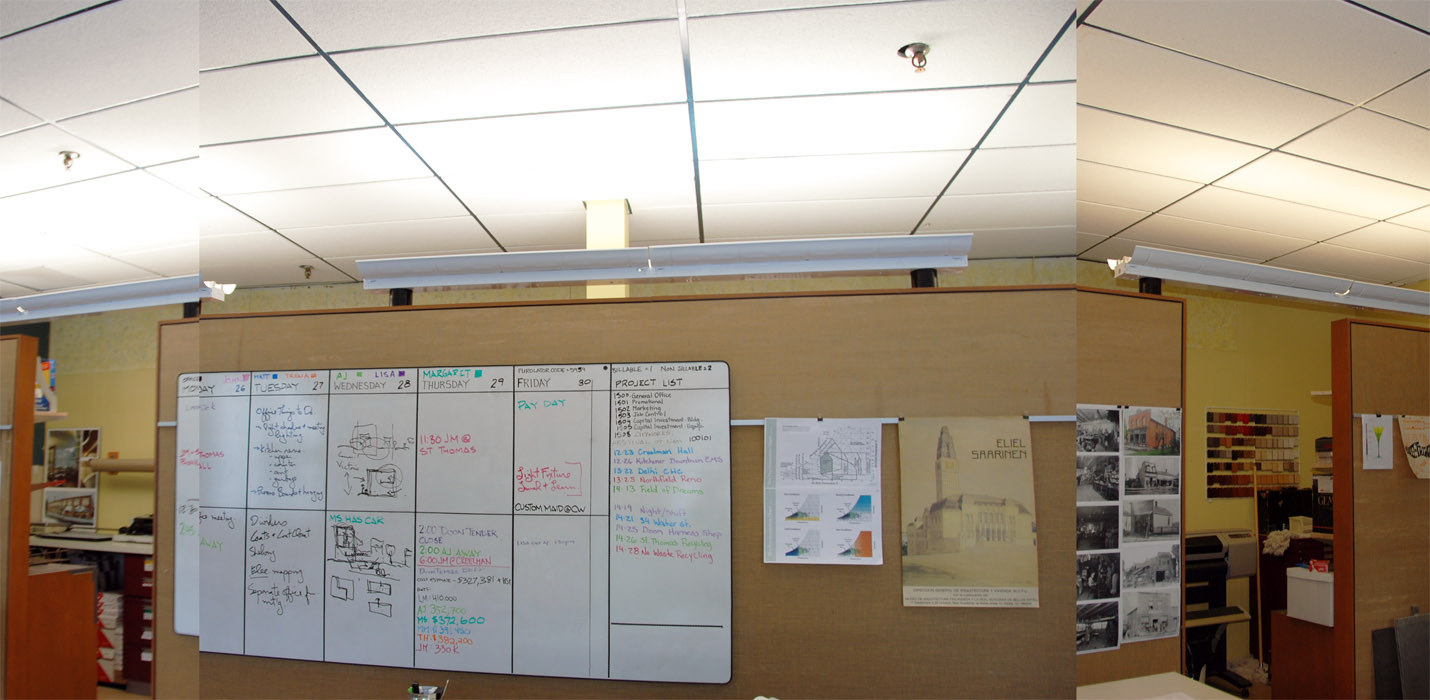
Existing condition of light fixtures

There where 6 designer and 4 days where given to prepare before each designer presented their idea. The process was to, come-up with a design, consider how to implement that design, create a short presentation and present it to the other designers and office. It is surprising the range of creativity and designs that where presented. See below for all 6 designs:

Margaret Composite txt-01

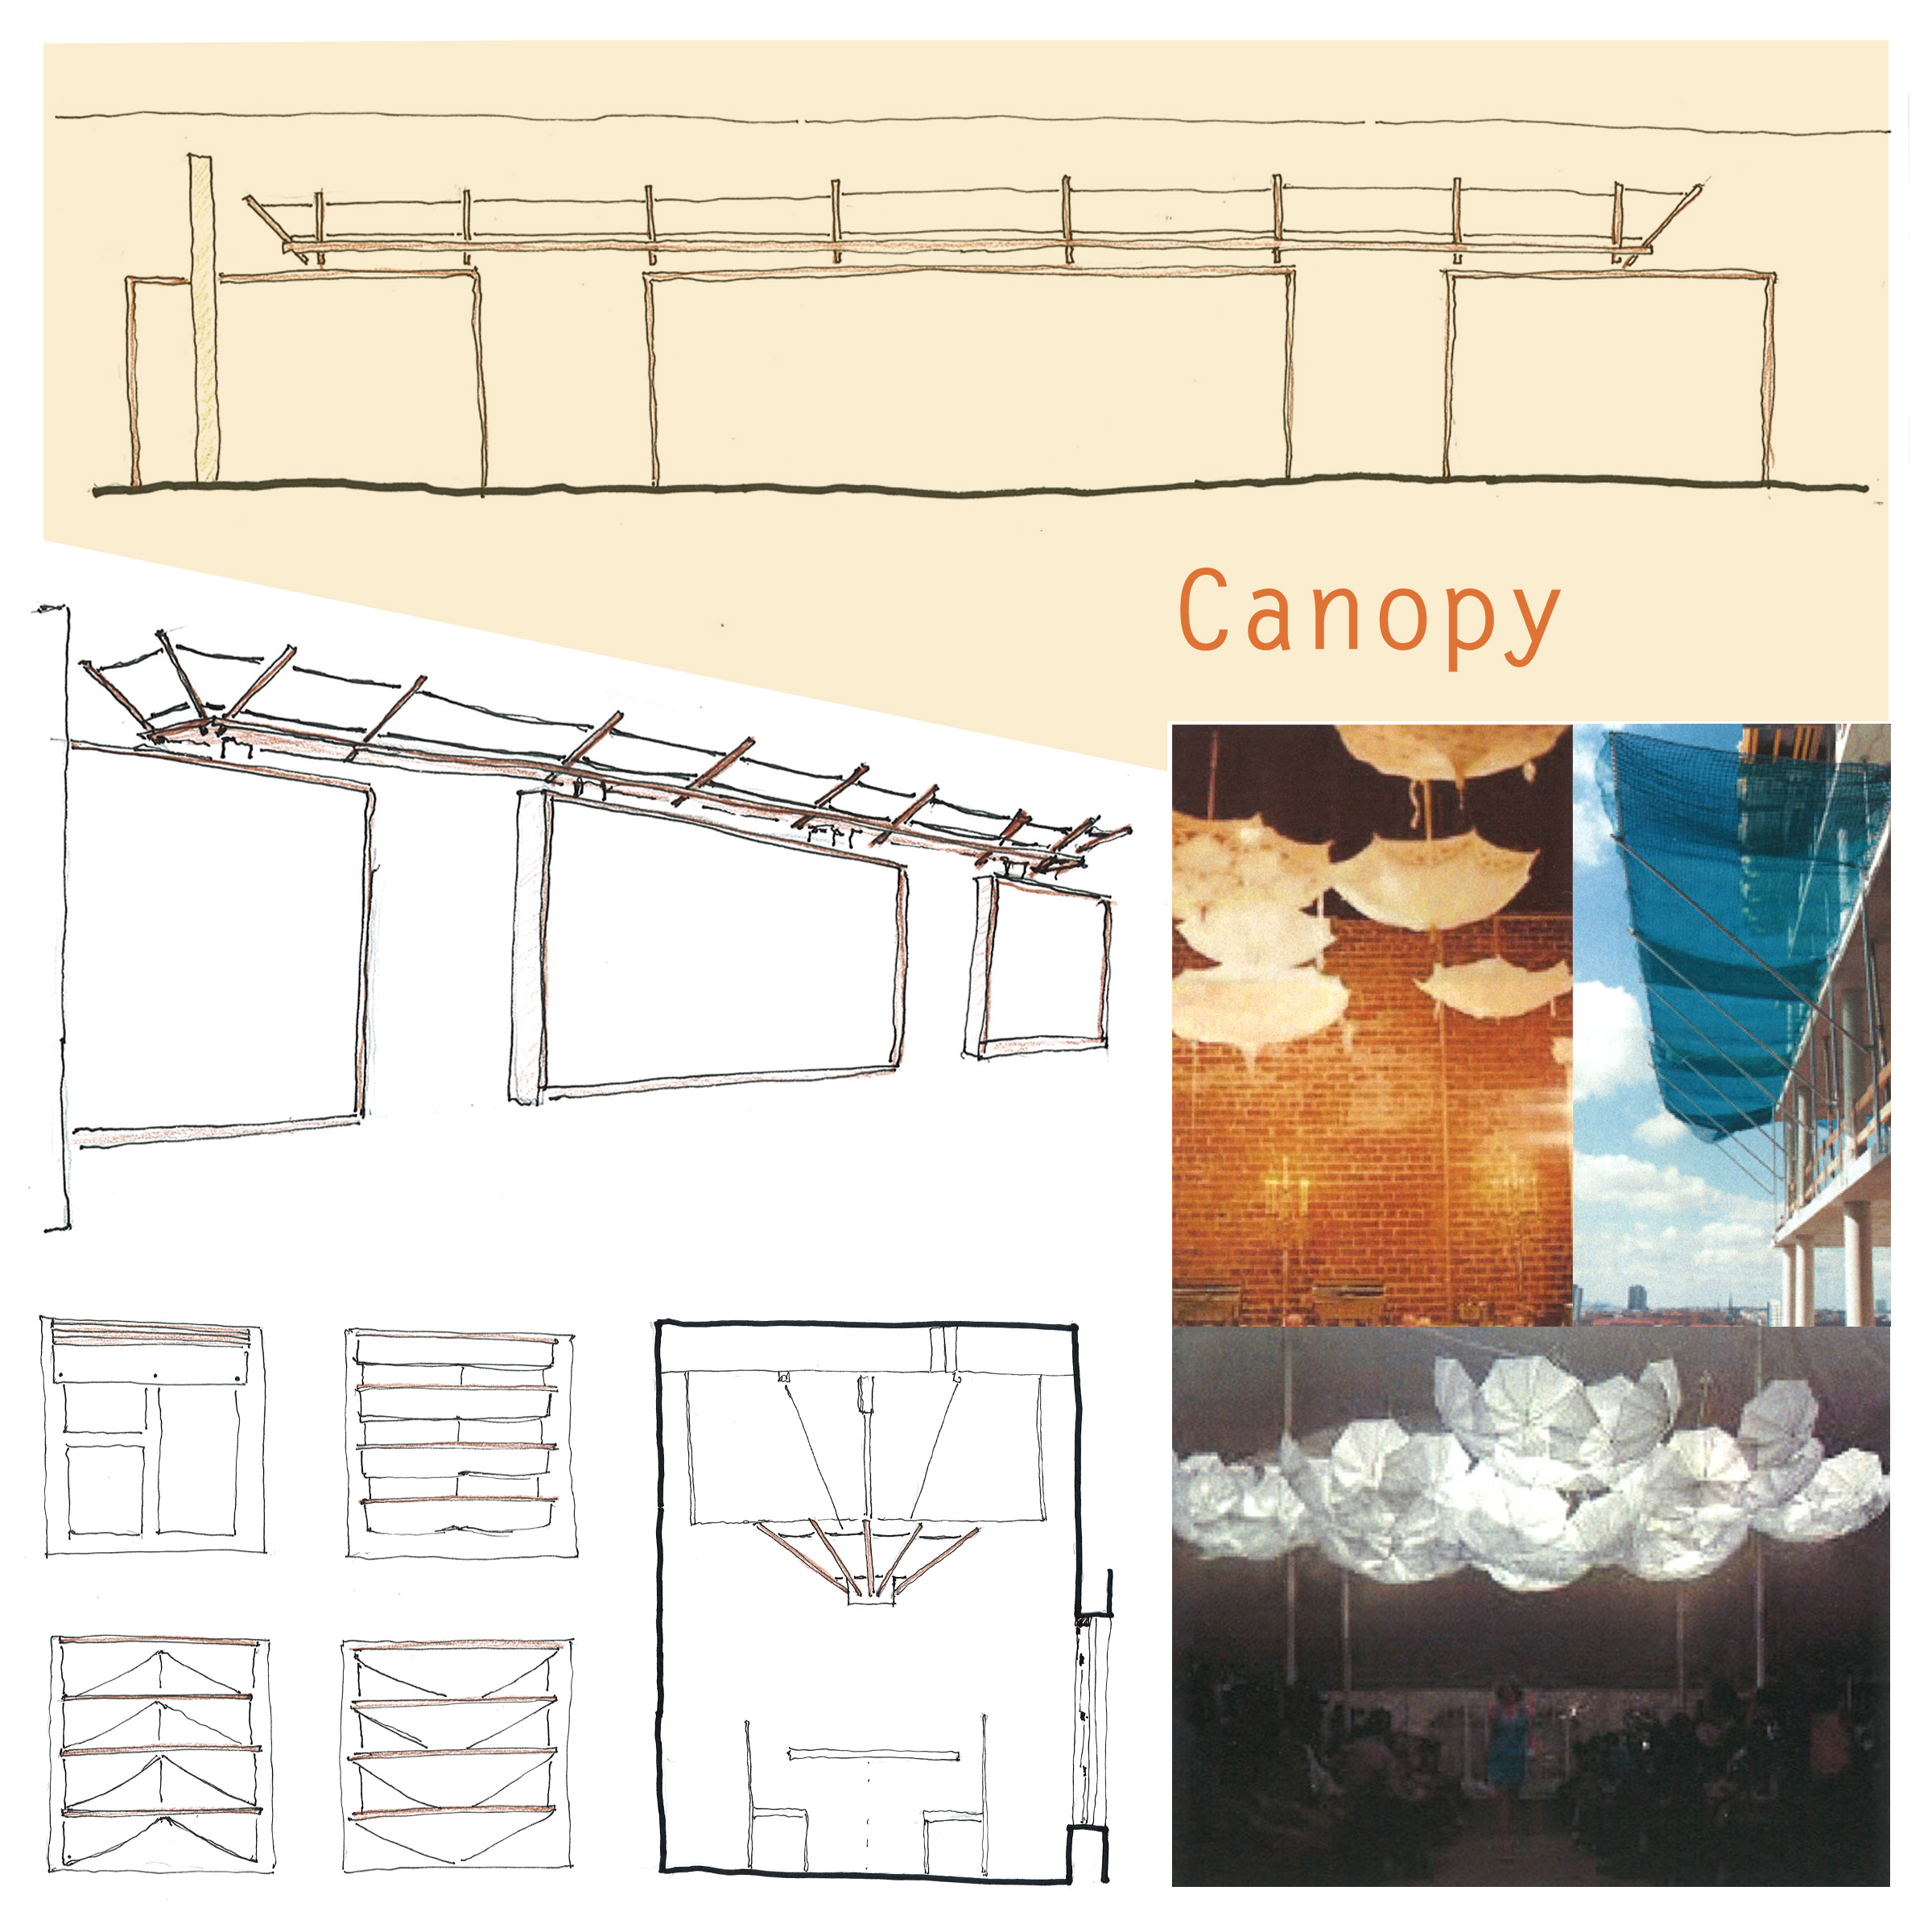
Lighting design 1 – Canopy

Trena Composite-01

Lighting Design 2 – Colour Wave

Lisa Composite

Lighting Design 3 – Reflecting Arc

John Composite txt

Lighting Design 4 – Backdrop

Ashley Composite txt

Lighting Design 5 – Light Wall

Matt Composite txt-01

Lighting Design 6 – Unfurl

At JMA we believe that exploring several options and approaches is the key to successful results. We have done DesignStorms for several projects large and small, from a 3000 sq. ft. house to an office redesign, to a little cottage kitchen renovation. The results are always promising and a variety of resolutions are presented, but we call it a DesignStorm and not a Design Competition, because the final design is alway some form of mixing the designs into one, creating the very best possible solution. It is really a process that helps the client see the possibilities and to select the elements that best suite them and their needs.

The final design for our office fluorescent light fixtures, wrapping the outside of the fixture with a canvas material and caping the ends with a custom wood piece, keeping the feeling of openness between the main room and storage room. The final product is a tribute to the Canopy and Backdrop designs, merged into a new design that is practical, functional and attractive.

Lighting Final

Adventures in Window Installation

One Thursday, a couple of weeks ago, the JMA office endeavoured to replace one of the existing, low performance windows in the office meeting room, with a newer, higher performance model. The building in which JMA is located is the renovated Bonnie Stuart Shoe Factory. The building was originally built in 1910 and carried out its shoe making processes until 1997. Over the years, renovations have been carried out to adapt this older building to its current usage. Replacing the old single pane windows are a part of this ongoing process of renewal.

JMA staff undertook the exercise of replacing the window in our office Meeting Room as a training exercise. Given the many times that each of us have drawn window details, we thought that this would be a good way to get a better understanding of the steps involved in constructing those details. Through this we also hoped to find better ways to detail our windows, while still considering ease of installation.

John pioneered the detailing of the windows with Monica, a JMA intern. With the details in mind, John assembled the materials we’d need for installation, including stainless steel trim, adhesives, vapour barrier tape and in lieu of butyl tape (which the hardware was out of), a sticky, black, resinous tape. In order to first remove the existing window and trim, we gathered an assortment of hammers, pry bars and power tools.

Adhesive applied to glass to control glass as it shatters.

Adhesive applied to glass to control glass as it shatters.

The construction team included John, Matt, Ashley and Lisa with Margaret as our occasional photographer. Our first steps involved preparing the new window for insertion into the opening as well as preparing the existing window for removal.

Preparation of New Window with trim and resinous tape flaps

Preparation of New Window with trim and resinous tape flaps

Removal of the Existing Window Part 1

Removal of the Existing Window Part 1

While John and Lisa worked on applying resinous tape flaps to the new window, Ashley and Matt rose to the challenge of removing the existing window glass and muntins. They wielded power tools like professionals and applied brute force as necessary.

Removal of the Existing Window Part 2

After the muntins came free, John had to grind down the remaining steel edges in order to smoothen the opening for the new window.

John with Grinder

John with Grinder

At that point, we were ready for the insertion of the new window. First, we ensured that insulation and blocking was installed at the bottom of the window opening. Then, since we attached the stainless steel trim to the window before hand, we lifted and fit the window into the available space with some thoughtful manoeuvring.

Installation with thoughtful manoeuvring

Installation with thoughtful manoeuvring

Connecting the existing vapour barrier to the new one was a challenge that took some innovation. Once the window was in its opening, we all worked hard to ensure that the vapour barrier flaps connected on all sides and applied some extra to ensure that corners were well sealed. Rock wool insulation was then placed at the stainless steel trim.

The new window installed.

The new window installed.

Many lessons were learned for the next time we do this. There is one more window in the office that needs the same treatment as this one. Now that the team has a bit of experience, I am sure that the next installation, will be quicker and easier.

The running joke that morning was, ‘how many architects does it take to install a window?’. Well, I’m here to tell you; it takes exactly four.